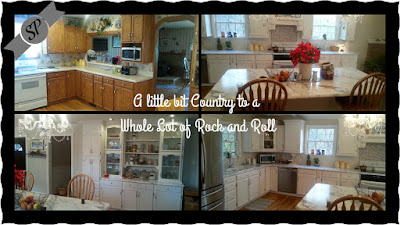
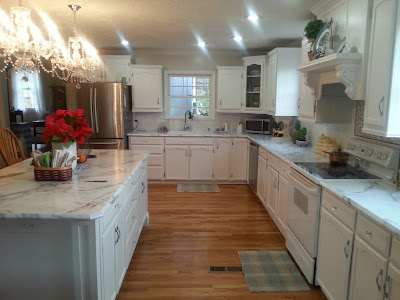
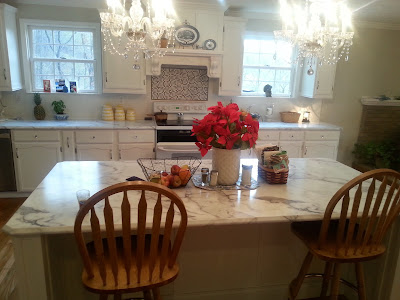
 here is a follow up on my kitchen. Someone asked about my countertop corners etc....
"Life is not measured by the number of breaths you take but by the moments that take your breath away?"
Author: Unknown
Wednesday, December 23, 2015
Grand Kitchen Remodel. I Love It!
We are all set for our family Christmas dinner this evening. There are still a few small things to do. Some drawers to build for inside the cabinets in the island and paint the bay window, and some new rugs and window treatments. Also a little more organizing. It turned out fantastic tho. Take a look....
 here is a follow up on my kitchen. Someone asked about my countertop corners etc....
 here is a follow up on my kitchen. Someone asked about my countertop corners etc....
Labels:
Kitchen remodel,
Kitchen Reno
Tuesday, December 01, 2015
HomeMade Non-dairy Yogurt
As you may remember, I have been eating a plant based vegan diet. I can't say I have been craving cheese. I haven't. I have been wanting to try my hand at cheese making tho. My husband enjoys his grilled cheese and cheese on pizza. I found recipe online that someone shared and reduced size to make 3/4 to 1 cup.
1/4 cup cashews soaked overnight and drained.
1/4 cup water
1 probiotic capsule opened
3/4 tsp tapioca starch
After draining nuts. Put in blender with 1/4 cup water and tapioca starch. Blend on high till very smooth. Then place in a small crock in oven with a plate to loosely cover. NO HEAT just the light on. Leave overnight. Then place in refrigerator tightly covered for about 8-10 hrs. Recipe said to then drain in fridge for 4-8 hrs. But mine was thick enough without so I didn't. You can then add sweeteners or fruit of your choice. I tried it plain and thought it was slightly less tangy than greek yogurt, but very good. I also added some maple syrup and thoroughly enjoyed it. The original recipe called for two probiotic caps with 2 cups nuts and two cups water and 2 Tb tapioca starch. But I wanted to see if I liked it first. SO I made a mini batch. Now off to finish my non-dairy mozzarella.

Labels:
plant based,
Recipes,
vegan
Almost Done!!
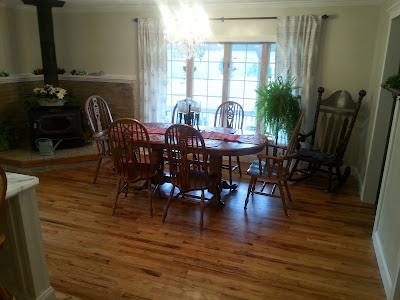
We are finally nearing the end of this huge remodel. What I initially thought would only take a couple weeks to complete has morphed into a couple months. We still have to put the crown molding along the ceiling , mantle above the fireplace, white subway tile back splash, and shelves between the two glass front cabinets on the wall with the pantry. I think we may also paint the bottom of the old wood table and the chairs white.
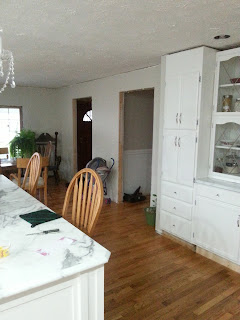
This is a little peak into the kitchen from the living room.
We still haven't found counter height stools that we like yet.
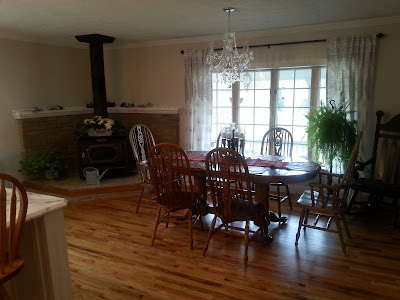
I still haven't gotten things put back in order from Thanksgiving dinner. Hence the two extra chairs and baby stroller. We dont have any babies right now but the grandchildren like using the stroller for their "babies", lo. When my husband gets the molding back up on my large bay then we will get it painted white.
The wood stove will get a nice heavy white mantle. Plus get cleared off lol.
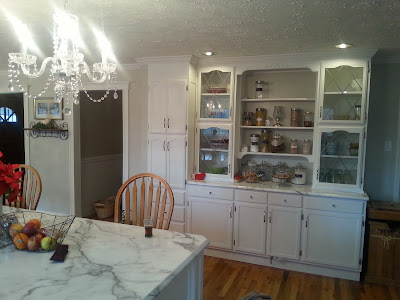
The old pantry cabinet is located to the far left. The two glass front cabinets were original to the old kitchen as well but hubby built the base cabinets. We were going to just simply put white shelves between them then crown molding across the top making it look like one big hutch. Like HERE
Then we saw Chip and Joanna do this kitchen on fixer upper HERE:
We love the rustic looking shelves with the black metal supports. I thought the black pipe might pull the black from the stove on the other end of the kitchen. So now we arent sure. We are kind of leaning to the simple white shelves tho to creat the country looking hutch.
Above, we were testing out the look using my black sweeper hose and an old board,lol
My husband and I designed this wonderful range hood and he built it. We work together well like that. I know he can do anything I dream up,lol. We still have to do the pretty tile pattern we have planned for here and add some stamped tin to the inside upper part around the fan/light.
I love these pretty crystal knobs. Real glass bought from ebay for .95 each. Cant beat that deal!
This is the end of the island. There is one thing I would have done different had we thought of it before it was built. I would have used wider boards for the top and bottom of the frames making up the corner legs so more showed once the moulding was in place. My wonderful guy also put me in a couple electric outlets in the ends of the island. These are so handy.
This is the front of the island cabinets that he built.They are not as difficult as they look when you have the right tools. Cheaper to build than buy the cheap particle board ones in stores even adding in the price of a Kreg jig for joining and a new router and router table. Just need some basic skills, a little internet research, and a little "Go For It..ness". I love my new island!

This is a little peak into the kitchen from the living room.
We still haven't found counter height stools that we like yet.
I still haven't gotten things put back in order from Thanksgiving dinner. Hence the two extra chairs and baby stroller. We dont have any babies right now but the grandchildren like using the stroller for their "babies", lo. When my husband gets the molding back up on my large bay then we will get it painted white.
The wood stove will get a nice heavy white mantle. Plus get cleared off lol.
The old pantry cabinet is located to the far left. The two glass front cabinets were original to the old kitchen as well but hubby built the base cabinets. We were going to just simply put white shelves between them then crown molding across the top making it look like one big hutch. Like HERE
Then we saw Chip and Joanna do this kitchen on fixer upper HERE:
We love the rustic looking shelves with the black metal supports. I thought the black pipe might pull the black from the stove on the other end of the kitchen. So now we arent sure. We are kind of leaning to the simple white shelves tho to creat the country looking hutch.
Above, we were testing out the look using my black sweeper hose and an old board,lol
My husband and I designed this wonderful range hood and he built it. We work together well like that. I know he can do anything I dream up,lol. We still have to do the pretty tile pattern we have planned for here and add some stamped tin to the inside upper part around the fan/light.
This is the end of the island. There is one thing I would have done different had we thought of it before it was built. I would have used wider boards for the top and bottom of the frames making up the corner legs so more showed once the moulding was in place. My wonderful guy also put me in a couple electric outlets in the ends of the island. These are so handy.
This is the front of the island cabinets that he built.They are not as difficult as they look when you have the right tools. Cheaper to build than buy the cheap particle board ones in stores even adding in the price of a Kreg jig for joining and a new router and router table. Just need some basic skills, a little internet research, and a little "Go For It..ness". I love my new island!

Labels:
Kitchen remodel,
Kitchen Reno
Subscribe to:
Posts (Atom)

